Raised-bed gardening — kits, soil, irrigation, season extension.

ByChen Wang · Senior Editor
Published May 31, 2026
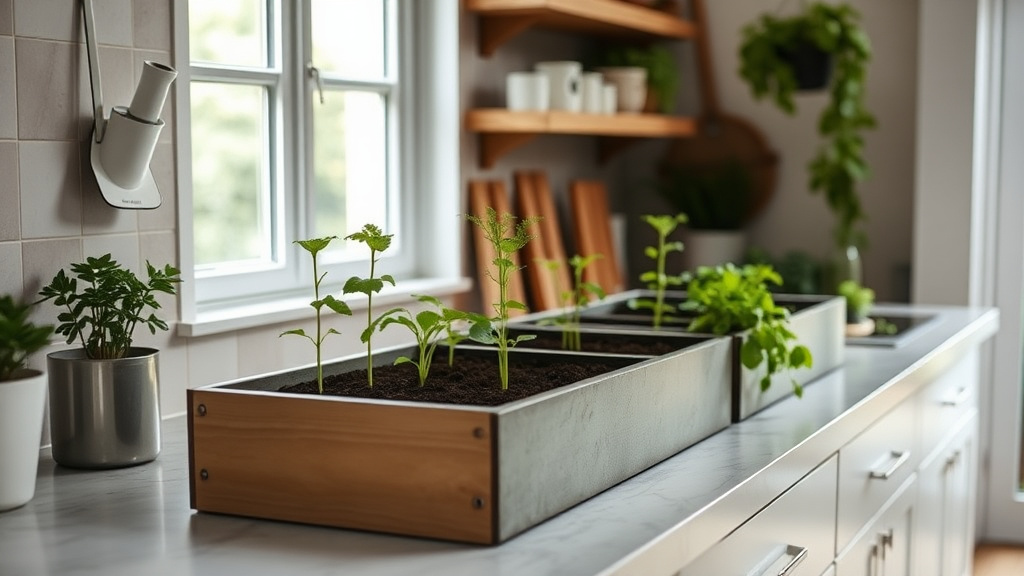
Raised-Bed Gardening: Kits, Soil, Irrigation, and Season Extension
Raised-bed gardening has become a popular way for gardeners—whether beginners or seasoned growers—to maximize space, improve soil quality, and extend their growing seasons. By elevating your garden beds off the ground, you gain better control over soil composition, drainage, and temperature, making it easier to grow healthy plants in a range of environments. In this article, we’ll break down the essentials: raised bed kits, choosing the right soil, irrigation solutions, and season extension techniques.
1. Raised-Bed Kits: Making Setup Simple and Flexible
Why Use a Raised-Bed Kit?
For many gardeners, purchasing a raised-bed kit is an attractive option because it simplifies the setup process. Kits typically come with pre-cut, treated wood or metal frames, along with assembly hardware and sometimes liners or corner connectors. This eliminates guesswork and provides a clean, sturdy frame that can be placed on most surfaces including bare soil, grass, concrete, or patio stones.
Raised-bed kits cut down the time and effort required to build beds from scratch. For example, a beginner gardener who’s unsure about measuring and cutting lumber can benefit from a kit that snaps or screws together in under an hour.
Choosing a Raised-Bed Kit
When selecting a kit, consider the following:
-
Material:
- Wood: Cedar and redwood are common because of natural rot resistance. Untreated pine costs less but tends to degrade within a few years unless sealed.
- Composite: Made of recycled plastic and wood fibers, these resist rot indefinitely but may have a synthetic look and higher upfront cost.
- Metal: Galvanized steel or aluminum lasts a long time and can offer a sleek modern aesthetic but may heat up excessively in full sun, which can stress plant roots.
-
Size:
- Width: 4 feet is standard since it allows for comfortable reaching from both sides without stepping into the bed. Narrower beds (2–3 feet) can work for tight spaces or balconies.
- Length: Longer beds (6–8 feet or more) maximize growing space but may require reinforcement to prevent bowing.
- Depth: 6–12 inches is common for shallow-rooted crops; 12–18 inches or deeper is preferable for root vegetables like carrots, potatoes, and beets.
-
Assembly:
- Kits vary in complexity. Some use bolts or screws, while snap-together designs involve no tools but sometimes lack long-term sturdiness. Check for instructions and included hardware.
-
Modularity:
- Certain kits are designed to be connected side-by-side or stacked vertically for tiered planting. This flexibility can help gardeners adapt to different spaces or expand over time.
DIY vs. Kits
DIY raised beds can be made from reclaimed wood pallets, bricks, stones, or cinder blocks. While they allow full customization, it requires measuring, cutting tools, and some woodworking skill. Here’s a brief cost and benefit comparison:
| Feature | Raised-Bed Kit | DIY Raised Bed |
|---|---|---|
| Cost | Moderate to High | Low to Moderate |
| Assembly | Fast and Easy, with instructions | Time-consuming, requires skills |
| Durability | Varies by material, often better | Depends on materials and build |
| Customization | Pre-defined sizes and styles | Fully customizable |
| Portability | Some kits are lightweight and modular | Usually permanent, heavy |
Step-by-step assembly for a basic kit:
- Choose and prepare the site (level ground, remove grass/weeds).
- Lay out kit components and hardware.
- Assemble frames according to instructions, tightening screws or snapping parts securely.
- Optional: Add bed liner to protect wood and retain soil.
- Fill with prepared soil mix (see next section).
- Install irrigation or plan watering method.
Example Raised-Bed Kit Brands and Models
- Cedar Grove 4x8 Wood Raised Bed Kit: Cedar wood, 12-inch depth, pre-cut with easy assembly connectors.
- GreenStalk Vertical Raised Bed Kit: Modular, stackable, made of recycled plastic composite.
- VegTrug Galvanized Steel Raised Bed: Durable metal design, includes liners, ideal for small patios.
Considerations for Location and Support
- Place beds on level ground for stability. Use a spirit level during setup.
- Consider foot traffic around beds; a walkway of 18–24 inches between beds allows comfortable passage.
- For longer beds over 6 feet, adding center support beams or corner braces can prevent warping.
2. Soil Selection: The Foundation for Success
The type of soil you put into your raised beds can define the success of your garden.
Why Raised Bed Soil Is Different
Because raised beds are above the native soil, you’ll need to fill them with a high-quality growing medium that supports plant roots, retains moisture, and drains well. Unlike in-ground gardens where you can amend existing soil, raised beds need a fully viable soil blend.
Ideal Raised Bed Soil Mix
A common and effective mix consists of:
- 50-60% Topsoil or screened garden soil:
This gives a mineral base but be picky—avoid soil with excessive sand (drains too fast) or clay (holds too much water, prone to compaction). - 30-40% Organic compost:
Compost adds essential nutrients, beneficial microbes, and improves moisture retention. Use homemade compost or buy from a reputable supplier. - 10-20% Aeration material:
Perlite, vermiculite, or coarse sand are used to increase drainage and keep the soil light, which is especially important during rainy periods to prevent root rot.
Many gardeners find success using a mix often referred to as ‘Mel’s Mix,’ which combines:
- 1/3 compost
- 1/3 peat moss or coconut coir (for moisture retention)
- 1/3 vermiculite (for aeration)
Adding Fertilizers and Amendments
Organic fertilizers such as bone meal (for phosphorus), blood meal (for nitrogen), or wood ash (for potassium) can be mixed in before planting or side-dressed later. Avoid over-fertilizing early on, which can burn tender roots.
Soil pH and Amendments
Most vegetables thrive in a slightly acidic to neutral pH (6.0 to 7.0). Test your soil with a DIY kit or through local extension services:
- If pH is low (<6.0): Add garden lime (calcitic or dolomitic) incrementally to raise pH over a few months.
- If pH is high (>7.0): Add elemental sulfur or peat moss to gradually lower pH.
Soil Maintenance Year-Round
- Top up compost each season to replenish nutrients.
- Rotate crops to prevent soil nutrient depletion and disease.
- Avoid compacting soil by stepping inside raised beds; instead, build beds narrow enough to reach easily from edges.
Soil Testing and Troubleshooting
- Use soil test kits or send samples to cooperative extension labs to check nutrient levels and pH.
- If you notice poor plant growth, yellowing leaves, or poor drainage, soil amendments may be necessary such as adding sand for drainage or organic matter for nutrient balance.
- Replace soil entirely every 3–5 years if buildup of salts or diseases occurs.
3. Irrigation: Consistent Watering for Healthy Plants
Watering raised beds efficiently is essential not only for plant health but also water conservation.
Watering Challenges with Raised Beds
Raised beds drain well and the elevated position exposes them to wind and sun, resulting in quicker drying compared to in-ground beds. This necessitates more attentive watering during peak heat or drought.
Irrigation Options
-
Manual watering:
Using watering cans or hose attachments offers control but can be labor-intensive. Ideal for small plots or container gardeners. -
Soaker hoses:
Perforated hoses distribute water slowly along the soil, saturating the root zone without overhead wetting. They save water and reduce weed growth on the surface. -
Drip irrigation systems:
The most precise and water-efficient method. With emitters delivering water to individual plants, drip systems reduce evaporation and runoff. Adding a timer automates watering, reducing user error and conserving water.
Example Setup: DIY Drip Irrigation for a 4x8 bed
- Purchase a drip tubing kit with emitters spaced every 12 inches.
- Lay tubing along rows, securing it with stakes.
- Connect tubing to a garden hose adapter with an inline filter to prevent clogging.
- Attach an automatic timer set to water early morning for 15 minutes daily (adjust based on weather).
- Mulch the surface to hold in moisture.
Tips for Effective Irrigation
- Water early in the day to reduce evaporation and prevent leaf diseases.
- Check soil moisture regularly by digging a finger below the surface; soil should feel moist but not soggy.
- Mulch the soil surface with straw, shredded leaves, or grass clippings to retain moisture and suppress weeds. Mulch also cools soil in summer and insulates it in cooler months.
Additional Considerations
- For uneven beds or sloped areas, place drip emitters more densely in the lower side to compensate for runoff.
- If using soaker hoses, bury lightly under mulch to extend hose life and reduce evaporation further.
- Install rain sensors or soil moisture sensors to automate and optimize watering schedules.
4. Season Extension: Grow More with Raised Beds
One key advantage of raised beds is their ability to warm faster in spring and retain heat later in fall, extending your growing season.
Techniques for Season Extension
-
Row covers:
Lightweight floating row covers made of spunbond polyester or polypropylene trap warmth while letting in light and rain. They protect against frost and insect pests without impeding airflow. Meant for cool season crops or hardening off seedlings. -
Cold frames:
Low structures with transparent lids (glass or clear plastic) placed over beds create a greenhouse effect. Cold frames are excellent for starting seedlings 4–6 weeks earlier or growing hardy greens through winter. -
Plastic tunnels or low tunnels:
Arched wire hoops covered with clear polyethylene create microclimates. They are less durable than cold frames but cheaper and easy to remove during the day to allow ventilation. Staple down edges to prevent wind damage. -
Cloche Covers:
Individual plant-level glass or plastic domes provide frost protection and trap heat. Used primarily for early tomato starts or delicate herbs. -
Mulching:
Applying organic mulch such as straw in early fall retains soil warmth and keeps roots from freezing.
Placement and Orientation
Maximize solar gain by orienting raised beds north-south. This reduces shading of plants by tall rows and encourages even sunlight on all sides. Avoid placing beds near large trees or buildings that cast shade or block wind needed to control humidity and pests.
Planning Your Season Extension Calendar
Use the following timeline to plan your raised-bed gardening season extension efforts:
| Month | Activity | Technique |
|---|---|---|
| February–March | Start seeds indoors or under cold frames | Cold frames, cloches |
| March–April | Harden off seedlings, early planting of cool crops | Row covers, low tunnels |
| May–June | Plant warm-season crops fully exposed | Remove covers on warm days |
| September | Reapply row covers or low tunnels for cool crops | Row covers, tunnels |
| November–December | Maintain cold frames for leafy greens, herbs | Cold frames |
Additional focus on ventilation in warmer months prevents overheating under covers.
Raised Bed Kits Comparison Table
| Feature | Wooden Kits (Cedar/Redwood) | Composite Kits | Metal Kits (Galvanized) | DIY Materials |
|---|---|---|---|---|
| Durability | 5-10 years (naturally rot-resistant) | 15+ years, rot-proof | 20+ years, rust-resistant (if galvanized) | Varies widely |
| Cost | Moderate | High | Moderate | Lowest (material-dependent) |
| Assembly Effort | Moderate, easy with instructions | Easy to moderate | Moderate, may require hardware | High - tools required |
| Heat Retention | Moderate | Moderate | High (can overheat roots) | Depends on materials |
| Aesthetic | Natural wood look | Uniform, sometimes synthetic | Industrial style | Varies (natural or repurposed) |
| Weight | Lightweight | Lightweight | Heavier | Varies |
| Modularity | Some kits modular | Some kits modular | Usually modular | Fully customizable |
| Environmental Impact | Biodegradable, renewable wood | Recycled plastic composites | Recyclable metal | Depends on source |
Raised Bed Gardening Checklist
Use this checklist to plan your raised bed garden project:
- Choose bed location with full sun (6+ hours/day).
- Select a raised-bed kit or gather materials for DIY.
- Measure and verify dimensions fit your space and needs.
- Prepare site by clearing grass/weeds and leveling ground.
- Assemble frame according to instructions or build DIY bed.
- Acquire high-quality soil mix (see Soil Selection).
- Fill bed with soil, loosen compacted soil layers.
- Select irrigation method and install (manual, soaker hose, drip).
- Apply mulch after planting to conserve moisture.
- Plan for season extension: Acquire row covers, cold frames, or tunnels.
- Monitor soil moisture, plant health, and adjust watering schedules.
- Rotate crops annually and amend soil with compost.
- Test soil pH and nutrient levels every 1-2 years.
- Reinforce bed structure or replace materials as needed (every 5+ years).
FAQ
Q1: How deep should a raised bed be?
A: The recommended depth is at least 6–12 inches for leafy greens and herbs, but 12–18 inches or more is preferable for root vegetables like carrots and potatoes to allow room for roots to grow freely.
Q2: Can I put a raised bed directly on concrete?
A: Yes. Raised beds can be placed on concrete, patios, or decks. However, be sure to include drainage holes or layer gravel beneath to prevent waterlogging and allow excess water to exit easily.
Q3: How often should I water raised beds?
A: Frequency depends on weather and soil. During warm, dry spells, daily watering might be necessary; cooler, humid weather requires less frequent watering. Check soil moisture by feeling a few inches below the surface to guide watering.
Q4: What plants grow best in raised beds?
A: Most vegetables, herbs, and flowers thrive in raised beds, especially those needing well-drained soil. Root crops, leafy greens, tomatoes, peppers, and bush beans do particularly well.
Q5: How do I prevent soil erosion in raised beds?
A: Use mulch to reduce surface runoff, install bed liners or fabrics if necessary, and avoid overwatering. Also, build beds with sturdy sides that can withstand heavy rains.
Q6: Can raised beds be used for container gardening?
A: Raised beds themselves are a form of in-ground container gardening. You can also place pots or grow bags inside raised beds for better space management or specific crop needs.
Q7: Do I need to replace the soil in raised beds yearly?
A: No, not typically. Instead, amend with organic matter like compost each season to replenish nutrients. Replace soil only if contamination or compaction becomes a problem.
Q8: How can I protect raised beds from pests?
A: Use row covers or insect netting to exclude pests. Incorporate companion planting to deter harmful insects. Physical barriers like fencing can keep out larger animals such as rabbits or deer.
Q9: Are raised beds suitable for growing fruit?
A: Yes. Strawberries, raspberries, and dwarf fruit bushes can do well in raised beds if given adequate depth and nutrient-rich soil. Larger fruit trees typically require more space and root volume than raised beds allow.
Q10: How long does it take for raised bed soil to “settle”?
A: Expect some settling of soil over the first few months after filling, especially if using loose compost or amendments. Add topsoil or compost to maintain bed height as needed before each planting season.
Raised-bed gardening offers a practical, productive, and adaptable way to grow plants efficiently. By selecting appropriate kits or materials, creating a nutrient-rich soil mix, installing effective irrigation, and using season-extension techniques, anyone can enjoy an extended and successful gardening season. With thoughtful planning and maintenance, raised beds can provide fresh produce and vibrant garden spaces for many years.